Will’s Zombie Birthday cake

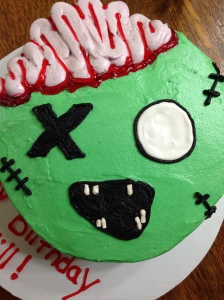
Made a cute zombie cake for a young boys birthday over the weekend. Got to practice my blood making skills (ewwwwwwie). But seriously, this stuff was AWESOME! It made a bright red pipe-able (is that a word?) gel and it did not take any special ingredients whatsoever. Mine dried to the consistency of jello, however, you could make it thinner for blood spatters (eww) or let it set some before piping to give it a different consistency overall.  I will share the recipe below though so you can make your own awesome cakes with this gel. It could be used for other things as well like blue for water!

 IMG_9823

Piping Gel Recipe

1/4 cup white corn syrup

1/4 cup water

3-4 Tablespoons corn starch (more or less depending on what you are using it for, I used 3 Tbsp + 1 tsp and it dried/cooled really thick like jello)

Stir together ingredients in a microwavable bowl. Heat for 1 minute and 30 seconds or until mixture boils. Remove from microwave and stir with a whisk. Add desired colors!

You can also add in some vanilla or other flavor if desired.

Happy Baking!

-B

Jake’s Batman Birthday Cake

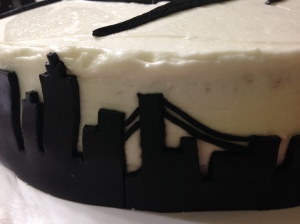
I had an awesome opportunity to make a birthday cake for a guy I grew up with a couple weeks ago. His wife wanted to do a surprise batman themed party and wanted a batman themed cake as well. She sent me some of the ideas that she found and liked and I went from there. The outcome was this really cool cake that would be good for all ages. Check out the pictures below!

IMG_8814 IMG_8816 IMG_8823

“Samoa” Cheesecake for Mommy’s Birthday

DSC_1257 (2)

My mom wanted this cheesecake for one of her “splurge” diet days, one of those days happened to fall on her birthday! So it became her birthday cheesecake. I used a picture she found as inspiration and made all my own recipes for the cheesecake. It is inspired by the girl scout coconut, caramel and chocolate cookies and it was sooo good!

Get the recipe for the cheesecake here. (just leave out the spices and exchange the pumpkin for 1/2 cup of sour cream.)

Caramel sauce is very simple:

  Caramel Sauce

                      1 cup packed brown sugar

              1/2 Cup half and half

1/4 cup butter

                       1 teaspoon Vanilla Extract

Over medium heat, combine cream and brown sugar  and butter. Whisk until sugar is dissolved and the sauce is smooth and thickens slightly. Add in a teaspoon of vanilla and continue to cook for another minute or so. remove from heat and allow to cool slightly before pouring into a jar for storage.

For the chocolate sauce i use a small amount of heavy cream warmed, add in chocolate and mix it until it is smooth and syrupy. For thicker chocolate sauce add more chocolate, for thinner chocolate sauce add more cream. It is super simple!

After you bake the cheesecake, top it with toasted coconut and drizzle with your homemade caramel and chocolate sauces!

Happy baking! -B

Mrs Linda’s Mini Birthday cupcakes

Made some mini cupcakes for my love’s mothers birthday. Simple vanilla cake with vanilla butter-cream and little pink sugar sprinkles. Simple, cute and tasty!

DSC_1284 (3)

Vanilla Butter Cake

Makes 1 bunt pan or 3 8inch rounds… for mini cupcakes I used 1/2 batch and it made 48 cupcakes.

  • 1 Cup Butter, softened
  • 1 1/2 Cup Brown Sugar
  • 4 Eggs
  • 2 Tablespoons Vanilla extract
  • 2 cups flour
  • 1 teaspoon baking soda
  • 1 teaspoon Baking Powder
  • 1/2 teaspoon Salt
  • 1 Cup Milk

Beat butter and sugar until fluffy.

Add in eggs, one at a time, mixing just until incorporated after each egg.

Add in vanilla and stir.

In a separate bowl combine dry ingredients. ( I always cheat this step if at all possibly because I hate making more mess than needed.      To skip this step for this recipe:  add 1 cup of my flour and the baking soda, powder and salt in; mix. Then add in my milk and mix. Then add in my last cup of flour…)

Add half of the dry mixture into butter/sugar mixture and beat.

Add in milk and beat until combined then add in the remaining flour mixture.

Ace’s 2nd Birthday Airplane Cake

IMG_7205

All Natural dyed airplane cake with sky & cloud cupcakes

Last weekend i had the opportunity to make an adorable little guys second birthday cake. His favorite flavor of cake is strawberry, and his mom is not into him having artificial dyes. So, I set out on an adventure to find a recipe for a strawberry cake made from real strawberries *gasp* not made from jello or any strawberry flavored things… Let me tell you! There are not many recipes out there! I did finally find one, and it turned out wonderful; tasted so very much like strawberry and was a pretty pink color when it was baked too. I made 2 dozen cupcakes and then a little airplane out of cake as well. For the airplane wings I used white chocolate, I sketched out how big i needed them, laid parchment down on top of that and then poured my chocolate with a spoon into the proper shape. Then before placing it in the cake I smoothed out the edges with a sharp knife to make it look a little neater.

Since little Ace’s mom does not want him to have artificial food coloring, I decided to make my own. I used a variety of veggies to get the pretty colors. I used beets for the red, purple cabbage for the blue and carrots for the yellow/orange color. I’ll tell you how I did it below the pictures 😉

IMG_7211

Top: Beet Red, Bottom Left: Carrot orange/yellow bottom right: Red cabbage blue/grey

For the blue I used red cabbage. I chopped it up and place it in a small saucepan with about 1/2 inch of water in the bottom. I then boiled it until the water was a dark purple…. Now you might be wondering, how does it turn blue though?! You add in something that has a base acidity, so for mine i used some strongly brewed green tea, you can also use baking soda, but i didn’t want my icing to taste like baking soda… After your cabbage “juice” has cooled you add in a small amount of the baking soda or green tea at a time until the purple is gone. This is a heat sensitive color. As the cupcakes sat overnight they turned back more purple than what they had started, which was disappointing. They still were a pretty color though and they were entirely natural!

For the red I did the same thing with the beets; cut three or four of  them up and boil them until your water is a bright hue, just allow your beet “juice” to cool and add it directly into your icing, I  used butter-cream and it mixed well with the icing and was smooth. It did get slightly darker as it sat.  For the carrots i repeated the process, unfortunately the carrots caused the icing to separate a little bit, I tired mixing it more and it would not stay together how I wanted it to. I will have to try the orange/yellow color again at some point…

I REALLY want to get a dehydrator and make my own red dye from beet powder.. I suspect it would be more potent color and would not change the texture of the icing as much as the beet juice did…. hmmmmmm….

Happy baking! -B

All Natural Strawberry Cake

This makes about 3 8 inch rounds, or i made one 8 inch round and 24 cupcakes
Ingredients
  • 3 C. Flour
  • 2 C. Sugar
  • 1½ Tablespoon Baking Powder
  • ¾ teaspoon Salt
  • ¾ C. Vegetable Oil
  • 1½ C. Strawberry Puree
  • 1 teaspoon Vanilla
  • 1 teasoon Lemon Juice
  • 4 Eggs, beaten

Preheat oven to 325 degrees.

Grease and flour  your pans.

In a large bowl,  combine the flour, sugar, baking powder, and salt.

Add in your  vegetable oil, strawberry puree, vanilla, and lemon juice to the dry ingredients and whisk until combined.

Add the eggs to the batter and whisk until smooth. do not over mix it or the cake could become too chewy.

Divide the batter evenly between the cake pans or into cupcake liners

Bake for 25-30 minutes, or until the cake springs back when gently touched (if using cupcake pans it should not take as long.)
Liam’s First Birthday Cake

On my extremely busy weekend filled with my best friends wedding, i also made a little boys first birthday cake.

Image

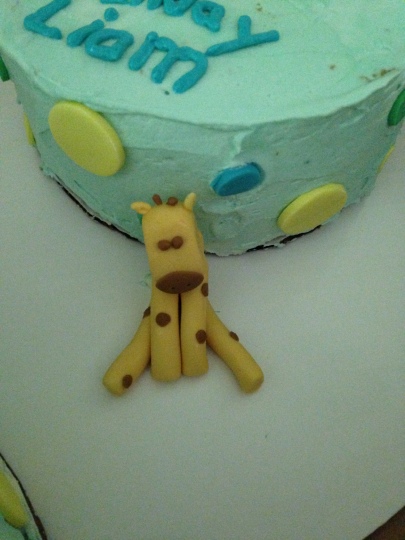
His mother decided to go with something fun along with some jungle animals because he loves them.

I made the little creatures out of fondant. It was so much easier to work with than the stinky gumpaste i used to sculpt a couple weeks ago. Note to self; only sculpt in fondant from now on. It is so much more forgiving. For the giraffe i simply made a long log and cut it into equal sections, then i squeezed them together at the top. Since he was sitting there wasn’t a need for a neck and body. Then i made a ball and pressed on the sides a bit to square it up for the head.

Image

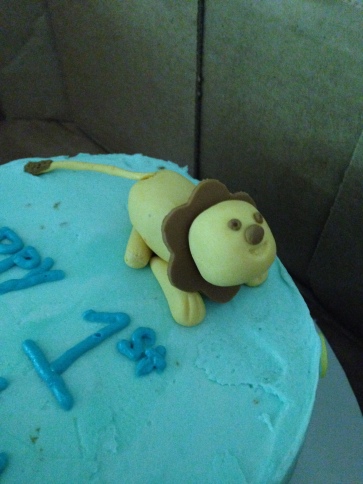
For the lion i did tapered logs for the feet, a ball for the head and an oblong ball for the body.  For the mane i used a flower cutter i had that worked out to be the perfect size!

Image